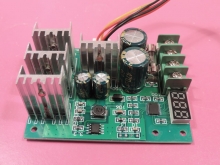
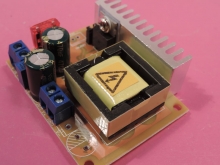
تایمر قابل تنظیم چند کاره با خروجی ماسفت
جدید با میکروکنترلر - بسیار کوچک و جمع و جور و پر قدرت
timer-mosfet-trigger-4-button
Adjustable Timer (MOSFET) up-to 15A DC w/ Trigger & Delay
Multi-Function Timer
تغذیه ۵ تا ۳۶ ولت مستقیم
دارای ۴ عملکرد
مشخصات و امکانات و توضیحات کامل و مفصل و چگونگی حالات و روش تنظیمات :
Applications
On/Off DC devices, motors, light bulbs, LED lights, DC motors, micro-pumps, solenoid valves, etc.
Features
- Only for DC devices, not working on AC devices
- Achieve a high-frequency circuit fast frequent on-off switch unlimited number of times
- Long life than regular relay
- Dual MOS shunt active output, lower resistance, more current, strong power
- Maximum load current 15A, 400W
- Wide working input voltage from DC 5 to 36V, widely used in any device
- Interface is clear and simple
- An emergency stop function ("STOP" button)
- Trigger signal with no common ground system to improve anti-jamming capability of the system (also self-shorting common ground)
- 0.1 seconds (minimum) to 999 minutes (maximum) continuously adjustable
- Sleep Mode - if this mode is enabled, screen will automatically turn off if without any operation for 5 minutes, any key will wake it up
- Settable OP, CL, LOP, which are independent of each other and are automatically saved
- After the module is powered down, all settings are memorized and will not be lost
- Optocoupler isolation, enhanced anti-jamming capability, industrial grade board
Specifications
- Power Supply: 5 - 36V DC
- Trigger Source: Active-high (3.0 - 24V)
- Output capability: Max. DC 36V 15A / 400W
- Standby Current: 15mA
- Working temperature: -40 to +85 ℃
- Size: 6.0 * 3.5 * 1.3cm
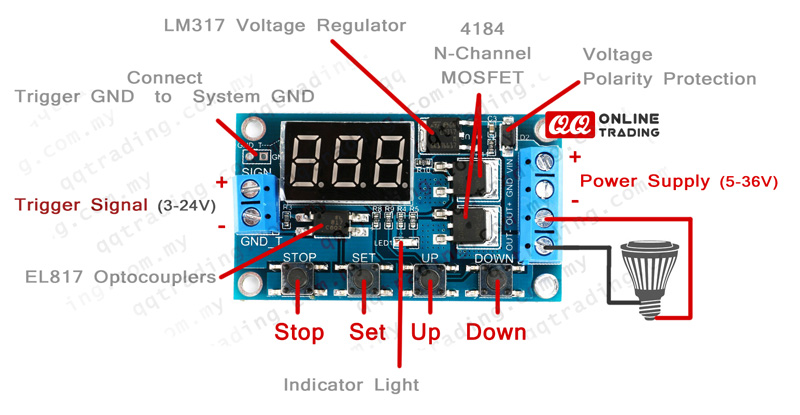
Mode
P1: (Require an external trigger signal)
After trigger signal received, turn on the LOAD for OP time then turn off the LOAD and waiting for next signal to on again.
Below are the options while OP is operating:
P1.1: Signal being trigger again will not interrupt the OP
P1.2: Signal being trigger again start OP again
P1.3: Signal being trigger again reset the timer and waiting for trigger signal again; (Turn off the LOAD & stop timing)
P2: (Require an external trigger signal)
After trigger signal received, turn off the LOAD for CL time then turn on the LOAD for OP time and waiting for next signal to off again.
P3.1: (Require an external trigger signal)
After trigger signal received, turn on the LOAD for OP time then turn off the LOAD for CL time, this will continuous loop / cycle.
Once trigger signal received again LOAD will off and loop will stop.
Cycle times (LOP) can be pre-set.
P3.2: (No trigger signal require)
Autorun, turn on the LOAD for OP time then turn off the LOAD for CL time, this will continuous loop / cycle.
Cycle times (LOP) can be pre-set.
P4: (Require an external trigger signal)
After trigger signal received, turn on the LOAD then start time counter
Once no more trigger signal LOAD will off and counter will stop.
p.s “LOAD” is the device you are going to control to on / off
Time
- 0.1 second (minimum) ~ 999 minute (maximum) adjustable
- Press STOP button to select the time frame by adjusting the decimal point
- xxx. – Decimal point at the back, 1 – 999 second
- xx.x – Decimal point at middle, 0.1 – 99.9 second
- x.x.x – Decimal point all light up, 1 – 999 minute
How to set
- The blinking Mode at the main menu is current mode (default is P1.1)
- To select the Mode by press and hold SET key for 2 seconds and select interface mode by pressing UP / DOWN key to choose the Mode (P1.1 ~ P4) and press SET to confirm
- After confirm the mode, it will need to set OP Time – Power on time (Closed circuit), UP / DOWN to choose, SET to confirm
- CL Time – Power off time (Open circuit), UP / DOWN to choose, SET to confirm
- LOP Time – Cycle / loop times (1-999 time / --- infinity), UP / DOWN to choose, SET to confirm
- After set the LOP, press and hold SET key for 2 seconds to back to main menu
Main menu
When the relay is not triggered, display shows "000" (with no decimal point).
When relay triggered will clearly show the decimal point
Mode select
Press and hold the “SET” button to enter
After setting, press the SET button for 2 seconds to back on main menu
STOP button features
- Relay mode
- ON: Normal mode
- OFF: Always off, disconnect the relay
In Main menu press the STOP button once to turn ON and OFF
Display will flashing and return to the main menu
(Stop button to emergency turn off the relay)
- Sleep Mode
- C-L Sleep mode: Auto turn off the display if no action in 5 minutes
- O-d Normal Mode: Display will always on
In Main menu press and hold STOP button for 2 seconds can achieve change from C-L to O-d;
Display will flashing and return to the main menu
لطفا منتظر بمانید

